
RD3: Storyboarding the Easy Way
April 26, 2021
One of the first tasks involved with the development of an eLearning course is called storyboarding.
A storyboard is a movie term, and it’s a visual representation of how a story will play out scene by scene. It’s made up of a chronological series of images with accompanying notes. The story board concept dates back to the 1930’s, and it was first used by an animator working for Walt Disney.
Basically, the storyboard is a transition tool between a written script and the movie.
How Do Storyboards Work in eLearning?
In eLearning, a storyboard is a little different. It’s used as the blueprint of a course. In this regard, it’s like a lesson plan, but it also specifies the:
- Visual elements
- Text elements
- Audio elements
- Interactions and branching
This is done for every screen in the course. Some people also add the learning objectives to the storyboard.
Storyboard Solutions for Your eLearning Course
There several tools you can use to create these storyboards. The most popular methods, often referred to as the Document approach, include:
- Word document
- Excel spreadsheet
- PowerPoint
You can also use an authoring tool such as Storyline, Captivate, or iSpring Presenter. In addition, you can use the Storyboard function of our RD3 system.
The Document Approach
The Document approach to storyboarding is definitely the most painful and time-consuming way for several reasons:
- There is no standardization
- It requires strict adherence to a protocol in order to standardize the approach
Unfortunately, humans make a lot of mistakes, so the adherence to a protocol is not guaranteed.
Authoring Tools
Using the authoring tool is a better approach because it puts the information directly inside the authoring tool. Since you’re using built in components of the tool, the protocol is easier to adhere to.
Document Approach and Authoring Tools Increase the Likelihood of Errors When Multiple SMEs Collaborate on the Course
Both of these approaches suffer from one major drawback: they rely on files that are stored somewhere – either on your hard drive, a company shared drive, or the cloud. This becomes problematic when more than one person is working on a course. However, some of the professional development tools offer a cloud-based infrastructure that gets around this problem.
There’s a valid reason for using more than one person for the storyboarding, especially for technical courses. It’s very possible for a Subject Matter Expert (SME) to make mistakes, so you really should use a second SME to proof the work of the first one. This is all designed to reduce the error rate, as well as improve the quality of the course because now you’re using multiple people to shape what the final product will look like.
When using one of the first two methods described above, the second SME would normally copy the file and rename it in order to indicate that the document is the latest revision. If that file gets passed back and forth a lot (like it does when you storyboard), you’re going to have a lot of similarly named files. Ultimately, this increases the likelihood that one contributor will work on the wrong file.
RD3 Eliminates the Risk of Working on the Wrong Version
Our approach to storyboarding is to use a cloud-based database, and we manipulate the storyboard using a web page. With databases, changes are submitted to the database server, and these submissions are queued. As a result, you’re guaranteed to always have the latest and greatest version, even if multiple people are working on the storyboard at the same time. The time stamp of the record serves as a revision number, and since we also log who made change, we can always trace back changes to a particular team member.
Creating a Storyboard in RD3
When you start working on a new storyboard, RD3 will create the first screen automatically. We call this a scene because there’s a lot of production similarities between an online course and a movie.
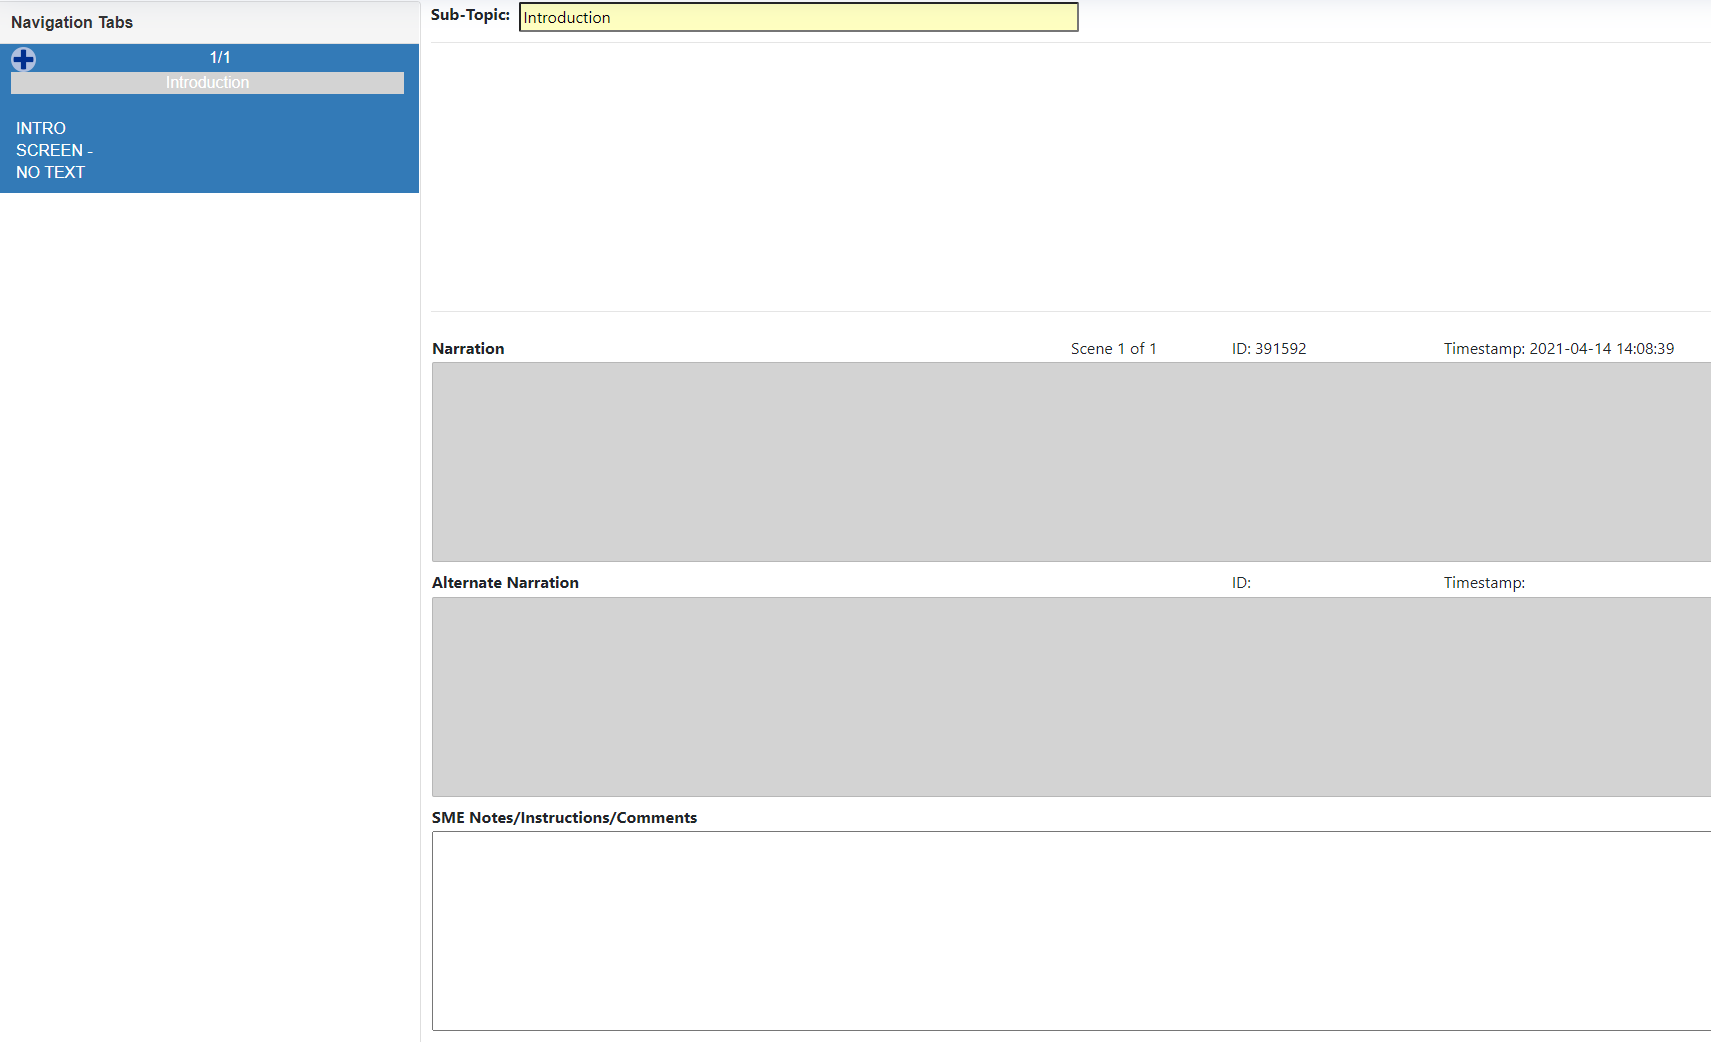
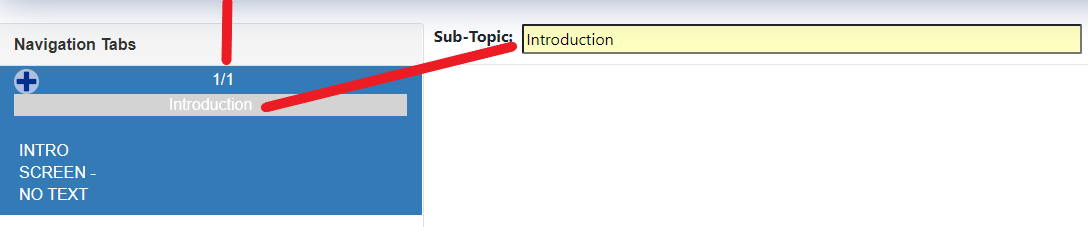
The first thing to notice on the screen is the Navigation tab. It looks like a PowerPoint interface because the intent is to provide the user something familiar, and most people are familiar with PowerPoint.
So far, you have 1 slide out of 1, and the subtopic of this slide is “Introduction,” which was set automatically by RD3.
Creating Your Course Outline
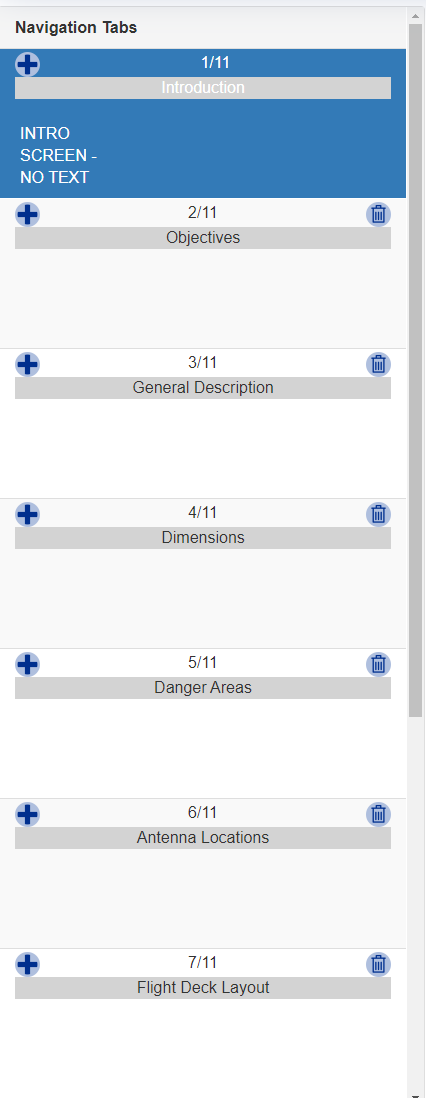
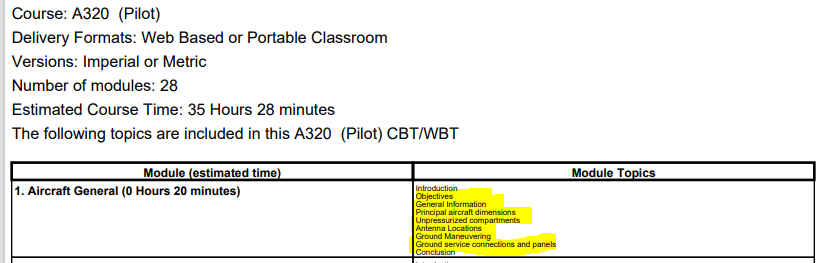
If you’ve ever taken a writing class before, you were probably told that in order to write effectively, you should make an outline of what you’re going to write about. For this example, I want to write the storyboard for the Aircraft General module of a course. The outline of this module is:
- Introduction
- Objectives
- General Description
- Dimensions
- Danger Areas
- Antenna Locations
- Flight Deck Layout
- Cabin Layout
- Doors
- Door Indications
- Conclusion
I’ll place this outline directly in the story board by using the + button. This adds a slide below the selected tile. The end result is depicted in the screen shot below.
Writing Your Course Content
Now that I have my outline, I can start writing the content of each subtopic. In our courses, we always include an objectives slide. This is an animated graphic, synchronized with the audio, that tells you what kind of information you’re going to learn in this particular module. To get started, I click on the second slide to select it. Then, I add the text that can be read by the student. It is also what’s going to be recorded later on.
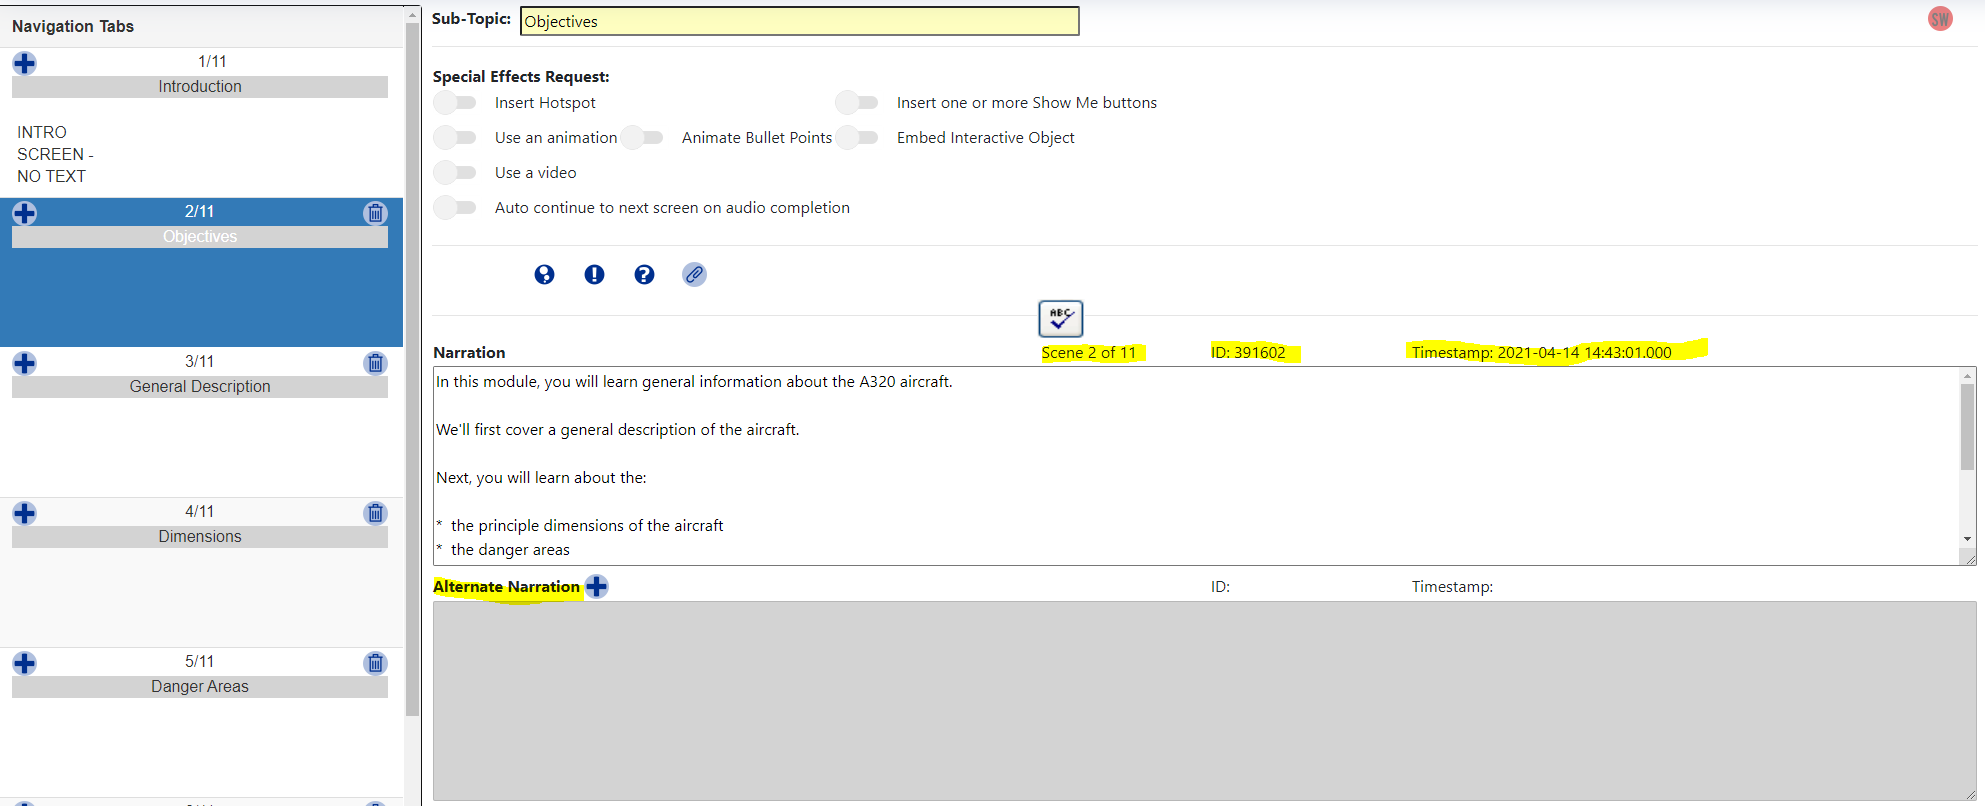
This is what it looks like after I added my objective text. I’ve highlighted four sections of the screen that might be of interest.
The first one is the scene (slide) number. In this case, I’m on the second scene out of 11.
The ID is a unique identifier generated by the database, and this is what is used when this particular record is changed.
On the far right side, we have a timestamp. It tells me the date and time, down to the second, when this record was created or updated. We use this time stamp for versioning of the module.
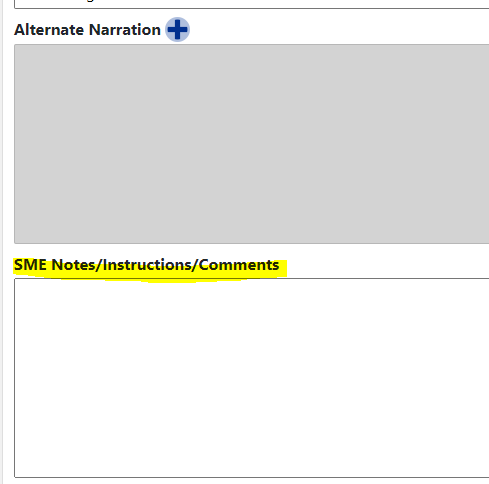
The bottom one is what we call the alternate narration. In general, our courses can be delivered using both the metric and imperial standards. When we have a slide with metric standards, we’ll type in the imperial equivalent in the alternate narration field. We could also write in English and use the alternate narration for a foreign language such as French or Spanish.
Additional RD3 Features Designed to Make Storyboarding Easy
There are several other features on the RD3 storyboard function that improve the user experience.
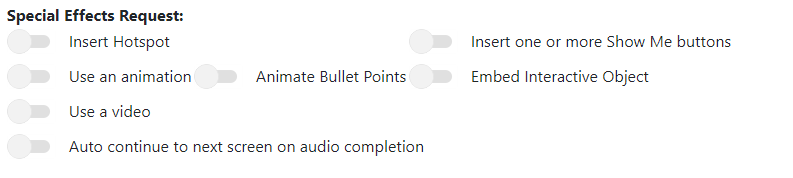
Special Effects Request
The SME uses the controls to indicate to the technical illustrator what they would like to have on this particular slide.
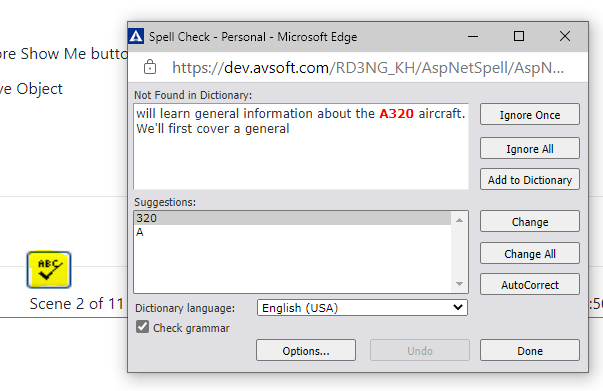
Spell Checker Tool
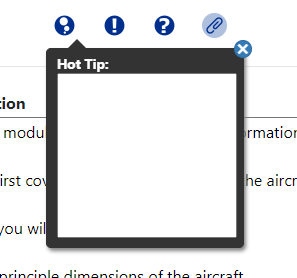
Supplemental Information Features
We also have controls to add what we call Hot Tips, Important Points, and Frequently Asked Questions. We use these to add additional information to a slide that may be of interest to the student, but doesn’t necessarily need to be covered, or to emphasize a point. When the course is viewed, these items are accessible by buttons that appear on the screen.
At the bottom of the screen, we have a field where the SME can enter information such as a reference to a particular document, instructions to the technical illustrator, or anything else.
Auto Save
One thing that you’ll quickly notice when working in RD3 is the absence of a save button. Changes are saved automatically when you select another slide or when you exit the story board function.
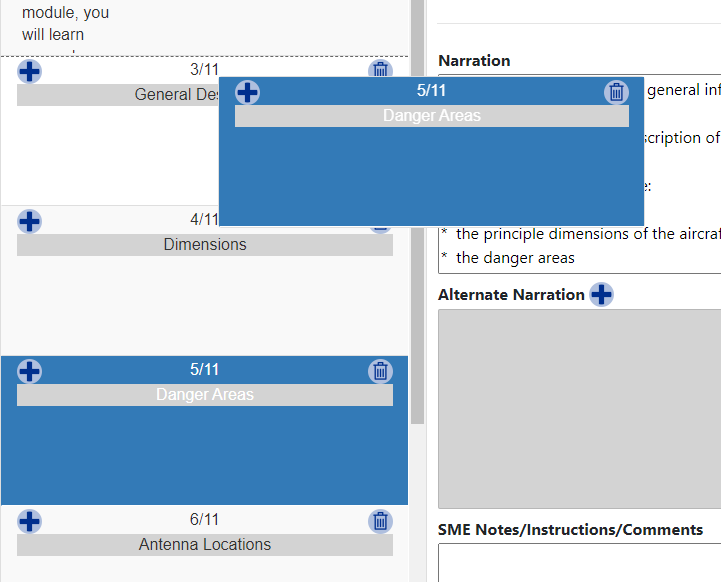
Reordering Slides
If you decide that you need to change the order of the slides, no problem. Simply drag a tile and drop it over the location where you want it to appear.
Course Outline Display
There’s one more noteworthy feature regarding the course outline. We use this in the course player to indicate to the student the section they’re in.

Finally, this feature can be used to dynamically generate course planning documents.
As you can see, the use of a database enables us to reuse data for different purposes without having to reinvent the wheel each time.